
How to install an eSIM on iPhone and Android
Install your Atli eSIM on Wi-Fi before you travel. You can use quick install, scan the QR code, or enter the installation details manually. You only install the Atli eSIM once. New plans you buy later are added to the same eSIM.
Before you install
- 1Check eSIM compatibility. Check your exact model in the list of eSIM-compatible phones.
- 2Make sure your phone is carrier-unlocked. A phone locked to one carrier may not accept an eSIM from another provider. Contact your carrier if you need it unlocked.
- 3Connect to stable Wi-Fi. Your phone needs an internet connection to download the eSIM profile.
Where do I find my eSIM?
Using WhatsApp or Telegram? Type wallet in Atli to open your active eSIMs and recent orders, then choose QR / Install.
Using the Atli app? Go to Profile › Purchases › My Plans and tap Install on your plan.
Bought your eSIM on HeyAtli.com? Open My Profile to view your purchased eSIMs. From there, tap iPhone, Android, or Manual setup, or scan the QR code.
Cannot find your QR code or activation details? See Lost your eSIM QR code? to retrieve them.
Choose how to install
Quick install (1-tap)
Best when you're using Atli on the phone you want to install the eSIM on.
- Tap Install on iPhone or Install on Android in your chat or profile.
- Your phone opens its cellular setup screen to download the eSIM profile.
- Tap Continue or Add to complete installation.
QR code
Best when viewing Atli on a laptop, tablet, or another phone.
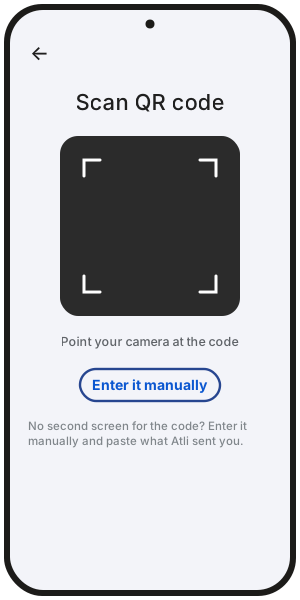
- Open the QR code on a second screen, or save the QR image to your photos on phones that support scanning from the camera roll (such as iOS 17+). Some supported Android phones also let you select a saved QR code from Photos.
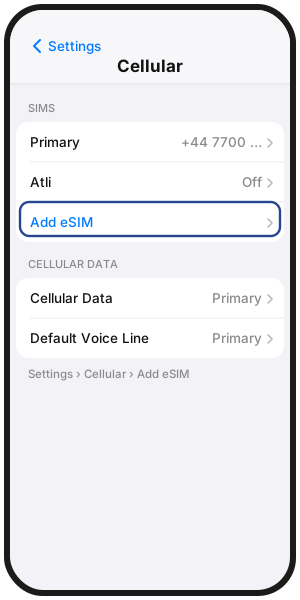
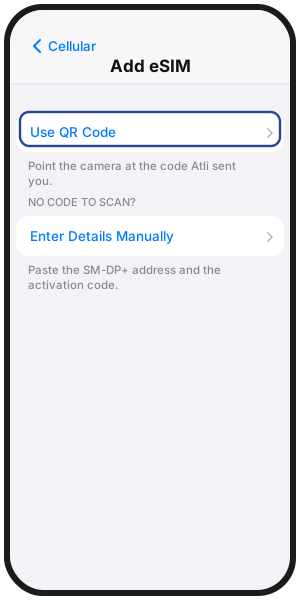
- iPhone: Settings › Cellular (or Mobile Data) › Add eSIM › Use QR Code, then scan the code.
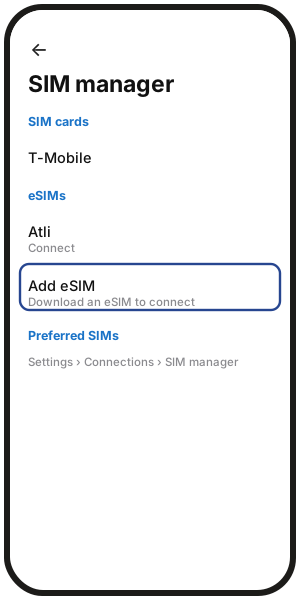
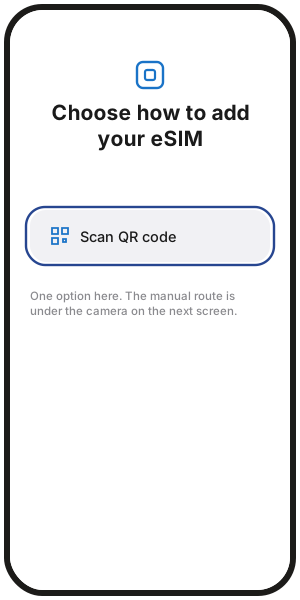
- Samsung: Settings › Connections › SIM manager › Add eSIM › Scan QR code.
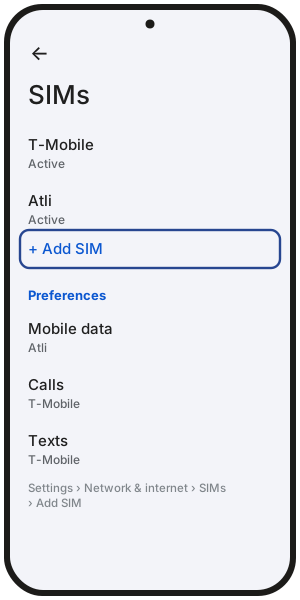
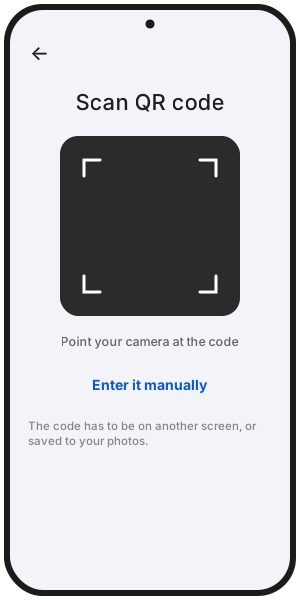
- Google Pixel: Settings › Network & internet › SIMs › Add SIM › Set up an eSIM, then scan the code.
Manual setup
Best if you have only one device and quick install is not showing or working.
Atli provides two values in your chat or profile:
- SM-DP+ Address: The server address used to download the eSIM profile.
- Activation Code: Your unique eSIM profile code.
Where to enter them in your phone's settings:
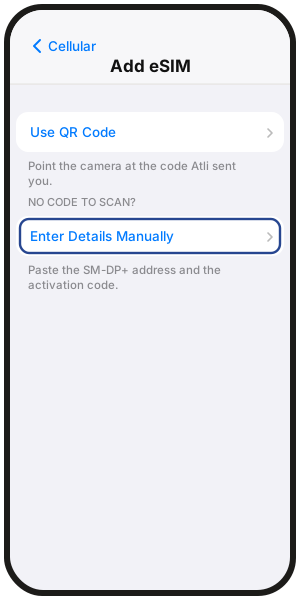
- iPhone: Settings › Cellular › Add eSIM › Use QR Code › Enter Details Manually.
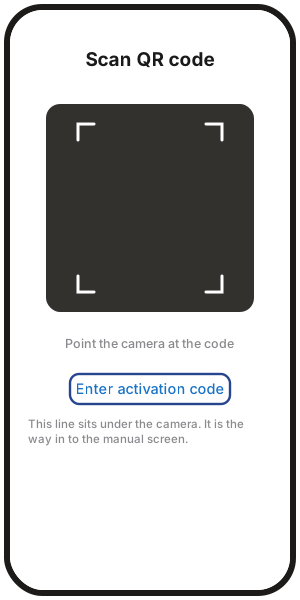
- Samsung: Settings › Connections › SIM manager › Add eSIM › Scan QR code › Enter activation code.
- Google Pixel: Settings › Network & internet › SIMs › Add SIM › Set up an eSIM, then choose to enter the code manually.
Asked what the line is for? Some phones ask during setup. Choose Data Only, not Voice and Data. Atli is data only.
See a new line called Connect? That's your Atli eSIM. Rename it Atli so it's easy to find.
After installing
Once installed, set these three things so your connection is ready when you arrive:
- 1Turn on the Atli eSIM line. Keep your regular SIM on if you still want to receive calls and SMS on your home number.
- 2Set Mobile Data to Atli. Select Atli as your active line for cellular data.
- 3Turn on Data Roaming for Atli. Data roaming is included with your plan. Turn data roaming off on your home SIM so your regular carrier does not charge roaming fees.
For complete, step-by-step device settings, see How to set up an eSIM on iPhone and How to set up an eSIM on Android.
Installation failed?
If you see an error like “Unable to activate eSIM” or “eSIM already added”, check that your phone is on stable Wi-Fi and is carrier-unlocked.
For detailed error codes and fixes, see what to do when an eSIM won't activate.
Do not delete the eSIM. Deleting it does not fix a failed install. Already deleted it from the same phone? Type wallet in Atli, open your eSIM, then tap QR / Install and try installing it again.
FAQ
When should I install my eSIM?
Before departure on Wi-Fi is best. The plan starts when your phone first connects to a supported network at your destination.
Do I need to install a new eSIM every time I buy a plan?
No. Atli uses a reusable eSIM. Plans you buy later, for a new trip or for more data, are added to your existing Atli eSIM.
Can I install the same eSIM on multiple phones?
No. Once an eSIM profile is downloaded and activated on one phone, it cannot be transferred or scanned on another device. To get a second device online, share your data with personal hotspot.
What should I do if my QR code won't scan?
Use the manual setup details (SM-DP+ address and activation code) in your phone's eSIM settings, or open the QR code on a second screen and turn up the brightness.
Why does it say "Activating" or taking a long time?
If installed before travel, your phone may display "Activating" or show no signal until you land at your destination and connect to a local network. This can be normal before you arrive and connect to a supported network.